How to Build a Gaming PC Step by Step: The Ultimate Guide
August 12, 2026 17 min read 3,319 words
Unlock superior performance and customization by assembling your own gaming rig with our expert, beginner-friendly instructions.
Start Building Your Dream PC
Planning Your Dream Rig: Component Selection and Budgeting
 Photo: Official Glacier / Pexels
Embarking on the journey of how to build a gaming PC step by step begins long before you even touch a screwdriver. The first and arguably most crucial phase is meticulous planning, specifically component selection and budgeting. This initial stage dictates the performance, aesthetics, and longevity of your future gaming powerhouse. Without a clear plan, you risk incompatibility issues, overspending, or underperforming hardware that doesn't meet your gaming aspirations.
Start by defining your budget. This isn't just about the raw cost of parts, but also factoring in potential peripherals like a monitor, keyboard, mouse, and operating system. A realistic budget allows you to prioritize components. For instance, if you're aiming for 1440p gaming at high refresh rates, a larger portion of your budget should be allocated to the Graphics Processing Unit (GPU) and a capable Central Processing Unit (CPU). Conversely, if you're on a tighter budget and targeting 1080p gaming, you can find excellent value in mid-range components.
Next, research individual components. The CPU and GPU are the heart and soul of any gaming PC. For CPUs, Intel's Core i5 or i7 lines and AMD's Ryzen 5 or Ryzen 7 series offer fantastic performance for gaming. Consider the 'generation' of the processor, as newer generations often bring significant performance improvements and efficiency gains. For GPUs, NVIDIA's RTX series and AMD's Radeon RX series dominate the market. Your choice here will largely determine the resolution and frame rates you can achieve in games. Don't forget to check benchmarks for the specific games you intend to play.
RAM (Random Access Memory) is another vital component. While 16GB is generally the sweet spot for modern gaming, 32GB provides more headroom for multitasking and future-proofing. Pay attention to RAM speed (measured in MHz) and latency (CAS Latency), as faster RAM can offer a noticeable boost, especially with AMD Ryzen CPUs. The motherboard acts as the nervous system, connecting all your components. Ensure it's compatible with your chosen CPU (socket type) and RAM (DDR4 or DDR5). Motherboards also come with different chipsets, offering varying features like PCIe Gen 4/5 support, Wi-Fi, and USB port configurations.
Storage has evolved significantly. An NVMe SSD (Solid State Drive) is a must for your operating system and frequently played games due to its lightning-fast load times. Traditional HDDs (Hard Disk Drives) can still be useful for mass storage of less-accessed files. The Power Supply Unit (PSU) is often overlooked but critical. It delivers power to all your components. Calculate your estimated wattage needs using online PSU calculators and then select a PSU with a slightly higher wattage rating (e.g., 650W for a 500W estimated build) and a good efficiency rating (80 Plus Bronze, Gold, or Platinum). Finally, the PC case houses everything. Choose one with good airflow, sufficient space for your components (especially your GPU and CPU cooler), and aesthetics that appeal to you. Adequate cooling is paramount, whether through air coolers or all-in-one (AIO) liquid coolers, to prevent thermal throttling and ensure stable performance. Consider adding extra case fans for optimal airflow. This careful planning stage sets the foundation for a successful and satisfying build, ensuring that your efforts in how to build a gaming PC step by step lead to the ultimate gaming experience. It's recommended to explore resources like
choosing the right CPU for gaming for more in-depth insights into specific component selection.
Assembling the Core: CPU, Cooler, RAM, and Motherboard Installation
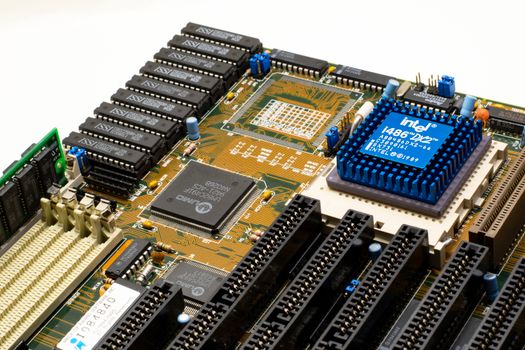 Photo: Nicolas Foster / Pexels
With your components in hand, the real fun of how to build a gaming PC step by step begins: assembly. Starting with the motherboard outside the case makes the initial installations significantly easier and reduces the risk of accidental damage. Always work on a clean, static-free surface, and consider wearing an anti-static wrist strap to protect delicate electronics from electrostatic discharge.
First, unbox your motherboard and place it on its anti-static bag or a non-conductive surface. Locate the CPU socket, which is usually covered by a plastic protector. Gently unclip the retention arm or lever, lift it, and carefully remove the protector. It's crucial to handle the CPU by its edges and avoid touching the pins (on AMD CPUs) or the contact pads (on Intel CPUs). Align the CPU with the socket, matching the small golden triangle on the CPU with the corresponding mark on the socket. For Intel, there are also notches on the sides to guide you. Once perfectly aligned, gently lower the CPU into the socket. Do not force it. If it doesn't drop in easily, re-check the alignment. Once seated, lower the retention arm/lever back into place to secure the CPU. This step requires a steady hand and confidence.
Next comes the CPU cooler. If you're using the stock cooler that came with your CPU, it often has pre-applied thermal paste. For aftermarket coolers, you'll need to apply a small, pea-sized dot of thermal paste to the center of the CPU's integrated heat spreader (IHS). Then, carefully mount the cooler according to its instructions. This usually involves aligning mounting brackets and screwing it down, or clipping it into place. Ensure even pressure to spread the thermal paste effectively. Connect the CPU cooler's fan cable to the 'CPU_FAN' header on your motherboard.
Installing RAM is relatively straightforward. Locate the RAM slots on your motherboard (usually two or four). Open the clips on both ends of the slot. Take your RAM sticks, ensuring the notch on the bottom of the stick aligns with the key in the slot. Press down firmly and evenly on both ends of the RAM stick until the clips snap into place. If you have two RAM sticks, consult your motherboard manual for the correct slots to use for dual-channel operation, which typically involves skipping a slot (e.g., slots A2 and B2).
Finally, it's time to install the motherboard into your PC case. Before doing so, ensure the I/O shield (the metal plate with cutouts for your motherboard's ports) is snapped into the back of your case. Carefully lower the motherboard into the case, aligning the screw holes on the motherboard with the standoffs (small raised posts) inside the case. Most cases come with standoffs pre-installed, but you might need to add or move some. Secure the motherboard with screws, but don't overtighten them. With these core components installed, your build is taking significant shape, and you're well on your way to completing the how to build a gaming PC step by step process.
Powering Up: GPU, Storage, PSU, and Cable Management Essentials
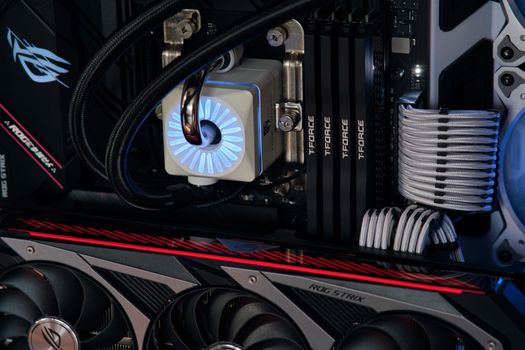 Photo: Ivelin Donchev / Pexels
Having installed the CPU, RAM, and motherboard, the next critical phase in how to build a gaming PC step by step involves integrating the power delivery system, storage, and the all-important graphics card. These components bring your PC to life and define its gaming prowess.
Start with the storage drives. If you have an NVMe SSD, locate the M.2 slot(s) on your motherboard. It's usually a small horizontal slot, often covered by a heatsink. Remove the heatsink (if present) and the tiny screw/standoff. Gently insert the NVMe SSD into the slot at an angle, then push it down until it sits flush. Secure it with the screw/standoff. For 2.5-inch SATA SSDs or 3.5-inch HDDs, mount them into the drive bays of your case. These bays typically use screws or tool-less trays. Once mounted, connect a SATA data cable from the drive to a SATA port on your motherboard and a SATA power cable from your power supply.
Next, the graphics card (GPU). This is often the largest and heaviest component. Locate the top PCIe x16 slot on your motherboard (it's usually reinforced and closest to the CPU). Remove the corresponding PCIe slot cover(s) from the back of your PC case. Open the retention clip at the end of the PCIe slot. Carefully align your GPU with the slot and push down firmly until it's fully seated and the retention clip snaps into place. Secure the GPU to the case with screws. Many modern GPUs require dedicated PCIe power cables directly from your power supply. Connect these cables, ensuring all pins are fully seated.
Now, for the Power Supply Unit (PSU). Most cases have a dedicated compartment for the PSU, usually at the bottom. Slide the PSU into its bay, ensuring the fan faces the correct direction (typically downwards if there's a vent on the bottom of the case, or upwards if not). Secure it with screws from the back of the case.
With the PSU in place, it's time for the most intricate part of the build: connecting all the power cables. This requires careful attention to detail.
1. **24-pin ATX power cable:** This thick cable powers the motherboard. Connect it to the large 24-pin connector on the side of your motherboard. It requires a firm push until it clicks.
2. **8-pin (or 4+4-pin) EPS CPU power cable:** This powers your CPU and is usually located at the top-left of your motherboard.
3. **PCIe power cables:** You've likely already connected these to your GPU. Ensure all necessary ports on your GPU are powered.
4. **SATA power cables:** Connect these to your SATA SSDs/HDDs.
5. **Case front panel connectors:** These are small, fiddly cables for the power button, reset button, USB ports, and audio jacks on the front of your case. Consult your motherboard manual for the correct headers, as they vary. Take your time here.
6. **Case fan cables:** Connect these to the 'FAN' headers on your motherboard.
Finally, cable management. This isn't just for aesthetics; good cable management improves airflow and makes future upgrades easier. Route cables behind the motherboard tray using zip ties or Velcro straps. Utilize cable cutouts in your case to bring cables to their respective components neatly. This stage, though time-consuming, is vital for the overall health and look of your PC. By following these steps, you're just one boot away from seeing the fruits of your labor in how to build a gaming PC step by step, and for those looking to optimize, consider exploring guides on
best practices for PC cooling solutions.
First Boot, Operating System, and Essential Troubleshooting Tips
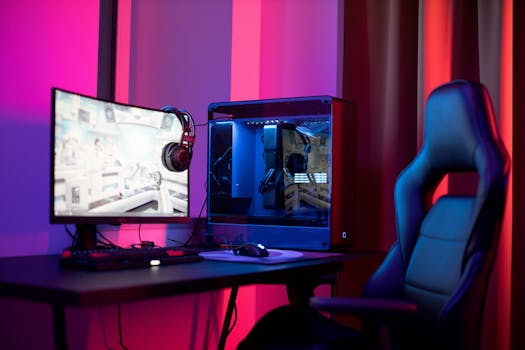 Photo: Ron Lach / Pexels
You’ve done it! All components are installed, cables are routed, and your PC looks like a beast. The final, exhilarating steps in how to build a gaming PC step by step involve the first boot, installing the operating system, and preparing for gaming. This is where your hard work pays off, but it's also where you might encounter your first few challenges. Don't worry; troubleshooting is a normal part of the PC building process.
Before powering on, double-check all connections: power cables to the motherboard, GPU, and storage; data cables to storage; and front panel connectors. Ensure your monitor is connected to your graphics card (not the motherboard's integrated graphics ports, unless your CPU doesn't have a dedicated GPU).
**The First Boot:**
Press the power button on your case. If all goes well, you should see fans spin up, lights illuminate, and, crucially, a display on your monitor showing the motherboard's BIOS/UEFI splash screen. If you get no display, or the fans spin for a second and then stop, don't panic. This is common.
**Common First Boot Troubleshooting:**
* **No display:** Ensure monitor is connected to GPU, not motherboard. Check GPU power cables are fully seated. Reseat RAM sticks. Try booting with only one RAM stick.
* **Fans spin but no display:** Similar to above. Also, ensure CPU power cable is connected.
* **PC powers on then immediately off:** Often a sign of a short circuit or improperly seated CPU/cooler. Double-check all standoffs. Ensure CPU cooler is mounted correctly.
* **Beep codes:** Many motherboards use a series of beeps to indicate specific errors. Consult your motherboard manual to decode these.
If you successfully reach the BIOS/UEFI, congratulations! This means your core components are working. Spend a moment in the BIOS to ensure your RAM is running at its advertised speed (enable XMP/DOCP profile), check that all storage drives are recognized, and set your boot order to prioritize your USB drive for OS installation.
**Operating System Installation:**
To install Windows (the most common OS for gaming), you'll need a bootable USB drive with the Windows Media Creation Tool. Insert the USB drive, restart your PC, and it should boot from the USB (if you set the boot order correctly). Follow the on-screen prompts to install Windows. You'll need a product key, which can be purchased separately. During installation, select the NVMe SSD as your primary drive for the OS.
**Post-Installation Essentials:**
Once Windows is installed, the next crucial step is installing drivers.
1. **Chipset Drivers:** Download these from your motherboard manufacturer's website. They optimize communication between your CPU and other components.
2. **GPU Drivers:** Download the latest drivers directly from NVIDIA or AMD's website. These are absolutely critical for gaming performance.
3. **Network Drivers:** If your internet isn't working, you might need to install Ethernet or Wi-Fi drivers from your motherboard's website. You might need to use another computer to download these.
4. **Other Drivers:** Install any other necessary drivers from your motherboard's support page (e.g., audio, USB 3.0).
Finally, update Windows, install your favorite games, and run some benchmarks to test your new rig! Enjoy the fruits of your labor – you’ve successfully completed the challenging yet rewarding process of how to build a gaming PC step by step and now possess a custom machine tailored to your exact needs. Remember, patience and methodical troubleshooting are your best friends throughout this journey.
**Troubleshooting Checklist:**
* **Check all power connections:** 24-pin ATX, 8-pin EPS, PCIe for GPU.
* **Reseat RAM:** Try one stick at a time in different slots.
* **Reseat GPU:** Ensure it's fully clicked into the PCIe slot.
* **Check CPU/cooler:** Ensure CPU is correctly seated and cooler is making good contact.
* **Clear CMOS:** Use the jumper or remove the motherboard battery for 30 seconds to reset BIOS settings.
* **Minimalist boot:** Try booting with only CPU, one RAM stick, and GPU (if no integrated graphics) to isolate the issue.
* **Consult manual:** Your motherboard manual is a treasure trove of information for header locations and error codes.