How to Build a Gaming PC Step by Step: Your Ultimate Guide
how to build a gaming PC step by step

How to Build a Gaming PC Step by Step: Your Ultimate Guide

Unlock superior gaming performance and save big by assembling your own custom PC with our easy-to-follow instructions.

Start Building Your Dream PC

Key Takeaways

  • ✓ Building your own gaming PC can save you hundreds, if not thousands, of dollars compared to pre-built systems.
  • ✓ Customizing a PC allows for tailored performance, aesthetics, and future upgradeability.
  • ✓ The process, while seemingly complex, is largely modular and accessible to beginners with proper guidance.
  • ✓ Essential tools are minimal, typically consisting of a screwdriver, zip ties, and an anti-static wrist strap.

How It Works

1
Planning Your Build & Sourcing Parts

Define your budget and performance goals, then research and purchase compatible components like CPU, GPU, RAM, and storage. This crucial stage sets the foundation for your entire system.

2
Assembling Core Components

Install the CPU, CPU cooler, RAM, and M.2 SSD onto the motherboard outside the PC case. This 'bench build' approach simplifies initial installation and troubleshooting.

3
Mounting & Wiring Inside the Case

Secure the assembled motherboard, power supply, and graphics card into the PC case. Carefully connect all power and data cables, paying close attention to cable management for airflow and aesthetics.

4
First Boot & Software Installation

Connect peripherals, power on the system, and enter the BIOS to verify component recognition. Install your operating system and drivers to bring your custom gaming PC to life.

Planning Your Ultimate Gaming Rig: Budget and Component Selection
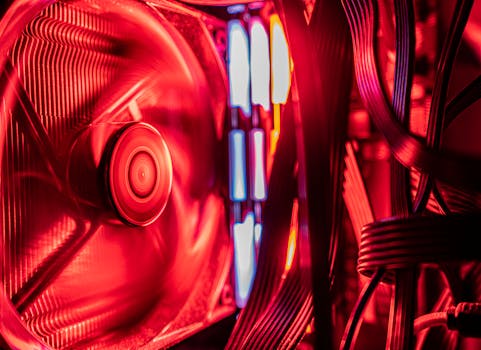
Vividly lit PC components showcasing modern technology and design. Photo: Dave Morgan / Pexels
Embarking on the journey of how to build a gaming PC step by step begins long before you even touch a screwdriver. The initial and arguably most critical phase involves meticulous planning: defining your budget and carefully selecting compatible components. Without a clear vision and a well-researched parts list, you risk encountering compatibility issues, overspending, or underperforming. First, establish a realistic budget. This isn't just about the components; remember to factor in the cost of an operating system (Windows is standard for gaming), peripherals like a monitor, keyboard, and mouse, and potentially software licenses or game purchases. A common mistake is allocating nearly all funds to the PC itself and forgetting these essential extras. Once your budget is set, you can begin to prioritize components based on your gaming preferences. Are you chasing ultra-high frame rates in competitive shooters, or stunning visual fidelity in single-player epics? This will dictate whether to prioritize a powerful GPU or a high refresh rate monitor. Next, dive into component selection. The CPU (Central Processing Unit) acts as the brain of your computer, handling general computations and game logic. Intel's Core i5/i7/i9 series and AMD's Ryzen 5/7/9 series are the primary contenders. For gaming, a mid-range i5 or Ryzen 5 is often sufficient, but higher-end CPUs provide better performance in CPU-intensive games or for multitasking while streaming. The GPU (Graphics Processing Unit), or graphics card, is the heart of any gaming PC. This component renders the visuals you see on screen. NVIDIA's GeForce RTX series and AMD's Radeon RX series are the market leaders. Your choice here will largely determine your in-game resolution, frame rates, and graphical settings. It's often recommended to allocate the largest portion of your budget to the GPU. RAM (Random Access Memory) is crucial for multitasking and game loading. 16GB is the sweet spot for most modern gaming, with 32GB offering more headroom for demanding applications or future-proofing. Speed (measured in MHz) and latency (CAS Latency) are also important factors; faster RAM can provide a noticeable boost in certain scenarios. For storage, a fast NVMe SSD (Solid State Drive) is virtually mandatory for your operating system and frequently played games. These offer lightning-fast boot times and game loading. Complement this with a larger SATA SSD or a traditional HDD (Hard Disk Drive) for bulk storage of less frequently accessed games and media. Choosing the right motherboard is also vital, as it connects all your components. Ensure it supports your chosen CPU socket (e.g., AM5 for modern AMD, LGA1700 for modern Intel), has enough RAM slots, M.2 slots for NVMe SSDs, and appropriate PCIe slots for your GPU. The Power Supply Unit (PSU) powers everything; use a reputable PSU calculator to determine the wattage you need, and always opt for a reputable brand with a good efficiency rating (e.g., 80 Plus Bronze or Gold). Finally, select a PC case that accommodates all your components, provides good airflow, and matches your aesthetic preferences. Don't forget a CPU cooler, especially if your chosen CPU doesn't come with one or if you plan on overclocking. Air coolers are generally more affordable and easier to install, while AIO (All-In-One) liquid coolers offer superior performance and aesthetics. For more in-depth guidance on component selection, check out our guide on choosing the best gaming PC components.

The Assembly Process: From Bare Bones to Functional System
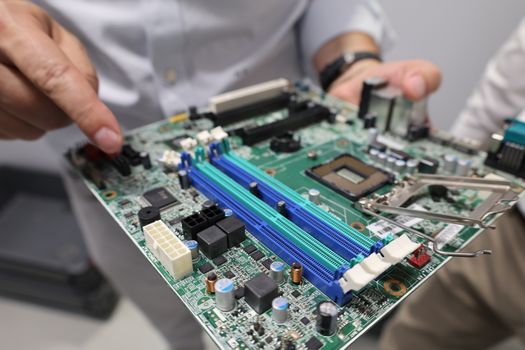
Close-up of a technician handling a computer motherboard, emphasizing technology and electronics. Photo: RETURN E-Waste / Pexels
With your carefully selected components in hand, the exciting part of how to build a gaming PC step by step truly begins: the assembly. Before you start, gather your tools: a Phillips head screwdriver (preferably magnetic), zip ties or Velcro straps for cable management, and most importantly, an anti-static wrist strap. Static electricity is the silent killer of PC components, so wear the strap and attach it to an unpainted metal surface of your PC case or power supply to ground yourself. Work on a clean, well-lit, non-carpeted surface. Begin by unboxing your motherboard. This is the central hub for all your components. First, install the CPU. Open the CPU retention arm or latch on the motherboard socket. Carefully align the CPU with the socket, matching the gold triangle or arrow on the CPU to the corresponding mark on the socket. Gently place the CPU into the socket – it should drop in without any force. Do NOT push or force it, as bent pins mean a ruined CPU or motherboard. Once seated, close the retention arm to secure it. Next, install the CPU cooler. If it's an air cooler, apply thermal paste (if not pre-applied) and secure the heatsink and fan according to the manufacturer's instructions. For AIO liquid coolers, install the pump head onto the CPU and mount the radiator to the case later. After the CPU and cooler (or just CPU for AIO) are in place, install your RAM. Open the clips on the RAM slots, align the notch on the RAM stick with the notch in the slot, and firmly push down on both ends until the clips snap into place. You should hear a satisfying click. If you have two sticks, typically install them in the second and fourth slots (A2 and B2) from the CPU for dual-channel performance – consult your motherboard manual. Finally, install your M.2 NVMe SSDs onto the motherboard. Locate the M.2 slot(s), remove the small screw and standoff, slide the SSD in at an angle, then push it down and secure it with the screw. Now, it's time to transfer these core components into your PC case. First, install the I/O shield (if not pre-attached to your motherboard) into the back of your case. Then, carefully lower the motherboard into the case, aligning the standoffs with the screw holes. Secure the motherboard with the appropriate screws. Next, install your Power Supply Unit (PSU) into its designated bay, usually at the bottom or top rear of the case, and secure it with screws. Run the necessary power cables (24-pin ATX, 8-pin CPU, PCIe for GPU) through the cable management cutouts in your case, but don't connect them to the components just yet. Finally, install your Graphics Card (GPU). Locate the top PCIe x16 slot on your motherboard (usually the one closest to the CPU). Remove the corresponding PCIe slot cover(s) from the back of your case. Open the retention clip on the PCIe slot. Align the GPU with the slot and push down firmly and evenly until it clicks into place. Secure it to the case with the screw(s). Connect the PCIe power cables from your PSU to the GPU. Connect the rest of the power cables (24-pin ATX to the motherboard, 8-pin CPU to the motherboard) and all front panel connectors (power button, USB, audio) according to your motherboard manual. This meticulous process ensures every component is correctly seated and powered, paving the way for a successful first boot.

Bringing Your Custom PC to Life: First Boot, BIOS, and OS Installation
A vintage Epson computer displayed indoors against a snowy window view in Milwaukee during winter. Photo: Quang Vuong / Pexels
You've meticulously followed the steps on how to build a gaming PC step by step, and all your components are securely in place. Now comes the moment of truth: the first boot. This stage is where your static collection of hardware transforms into a functional, roaring machine. Before powering on, double-check all your connections. Ensure the 24-pin ATX power cable is firmly seated in the motherboard, the 8-pin CPU power cable is connected, and your GPU has all its required PCIe power cables. Verify that your RAM sticks are fully clicked in, and your CPU cooler fan is connected to the correct header on the motherboard. Connect your monitor to the graphics card (NOT the motherboard's video outputs, unless you're using an integrated GPU and have no discrete card yet), and plug in your keyboard and mouse. With everything connected, flip the switch on your PSU to the 'on' position and press the power button on your PC case. If everything is correctly assembled, you should see fans spin up, RGB lights illuminate (if applicable), and most importantly, a signal on your monitor. This signal will typically be your motherboard's splash screen, followed by access to the BIOS (Basic Input/Output System) or UEFI (Unified Extensible Firmware Interface). If you encounter no signal, or the system powers on then off repeatedly, don't panic. Re-check all power connections, reseat your RAM, and ensure your GPU is firmly in its slot. Many motherboards have diagnostic LEDs or a POST (Power-On Self-Test) code display that can help pinpoint issues. Once in the BIOS/UEFI, your first task is to verify that all your installed components are recognized. Check that your CPU, RAM (correct capacity and speed), and storage devices (NVMe SSD, SATA SSD/HDD) are listed. You might need to enable XMP/DOCP for your RAM to run at its advertised speed, as it often defaults to a lower frequency. Set your boot order to prioritize the USB drive containing your operating system installer. Save your changes and exit the BIOS, which will typically cause the system to reboot. With the system rebooting, it should now boot from your USB installer. Follow the on-screen prompts to install your operating system, usually Windows for gaming. This process involves selecting your language, accepting terms, choosing a custom installation, and selecting the NVMe SSD as your primary drive. Allow the installation to complete, which may involve several reboots. Once Windows is installed, the next crucial step is to install all necessary drivers. Start with the chipset drivers from your motherboard manufacturer's website, then your GPU drivers from NVIDIA or AMD's official sites. Finally, install any other peripheral drivers (audio, network, etc.). These drivers are essential for optimal performance and stability. A fresh installation of Windows and up-to-date drivers will ensure your custom-built gaming PC is ready to deliver the performance you've been dreaming of. For troubleshooting common boot issues, refer to our dedicated guide on PC building troubleshooting.

Optimizing Your Gaming Experience: Tips and Common Mistakes to Avoid
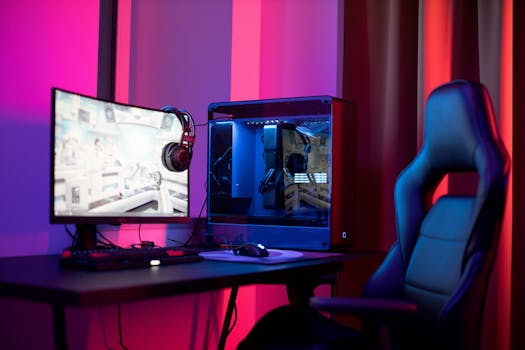
A sleek gaming setup featuring a high-end PC, widescreen monitor, and ergonomic chair lit by neon lights. Photo: Ron Lach / Pexels
Having successfully navigated how to build a gaming PC step by step, your journey doesn't end at the desktop. Optimizing your system is key to maximizing its performance and longevity. Here are some essential tips and common mistakes to avoid: **Tips for Optimization:** * **Keep Drivers Updated:** Regularly check for new GPU drivers from NVIDIA or AMD, as these often include performance optimizations for new games. Motherboard chipset and audio drivers also benefit from occasional updates. * **Monitor Temperatures:** Use software like HWMonitor or MSI Afterburner to keep an eye on your CPU and GPU temperatures, especially during gaming. High temperatures can lead to throttling and reduced performance. Ensure good airflow within your case. * **Cable Management:** While primarily aesthetic, good cable management significantly improves airflow, which in turn helps with cooling. Take the time to route cables neatly behind the motherboard tray. * **Fan Curves:** Adjust fan curves in your BIOS or through software (e.g., Fan Control) to balance cooling performance with noise levels. You can set fans to spin up more aggressively when temperatures rise. * **Overclocking (Cautiously):** If you have a 'K' series Intel CPU or a Ryzen CPU and a compatible motherboard, you can gently overclock for extra performance. Research thoroughly and proceed with caution, as improper overclocking can cause instability or damage. * **Clean Your PC:** Dust is the enemy of electronics. Periodically clean your PC with compressed air, focusing on fans, heatsinks, and dust filters. This prevents heat buildup. * **Windows Optimization:** Disable unnecessary startup programs, use Windows's 'Game Mode,' and ensure your power plan is set to 'High Performance' for gaming sessions. **Common Mistakes to Avoid:** * **Forcing Components:** Never force a component into a slot. If it doesn't fit easily, recheck alignment or compatibility. Forcing can bend pins or damage sockets. * **Forgetting Thermal Paste:** If your CPU cooler doesn't have pre-applied thermal paste, forgetting to apply it will lead to immediate overheating. * **Incorrect RAM Installation:** Not pushing RAM sticks in fully or installing them in the wrong slots can prevent your PC from booting or running in dual-channel mode. * **Ignoring Cable Management:** Tangled cables impede airflow and make future upgrades or troubleshooting more difficult. * **Not Installing Drivers:** Your PC will run poorly, or not at all, without the correct drivers for your GPU, chipset, and other components. * **Poor Airflow:** Incorrect fan placement (e.g., all exhaust, no intake) or insufficient fans can lead to thermal throttling. * **Buying Incompatible Parts:** Always double-check CPU socket type, RAM generation (DDR4 vs. DDR5), and PSU wattage requirements during the planning phase. By avoiding these pitfalls and implementing optimization strategies, you'll ensure your custom-built gaming PC performs at its peak, providing you with countless hours of smooth, immersive gaming.

Comparison

FeaturePre-built PCCustom-built PC (DIY)
Cost EfficiencyHigher initial cost for similar specsSignificantly lower cost for equivalent performance
CustomizationLimited options, often fixed configurationsComplete control over every component, tailored to needs
UpgradeabilityOften proprietary parts, limited future upgradesModular design, easy to upgrade individual components
Performance/PriceLower value for moneyHigher value for money, optimized performance
Learning CurveNone (plug and play)Requires research and assembly knowledge
TroubleshootingManufacturer support (RMA)Self-reliance, community support
WarrantyCovers entire systemIndividual component warranties

What Readers Say

"This guide on how to build a gaming PC step by step was a godsend. I had zero experience, but the clear instructions made the process feel manageable and even fun. My new PC runs like a dream!"

Alex K. · Austin, TX

"I saved over $500 building my own gaming rig using this article as my primary reference. Every step was detailed, from component selection to the first boot. Highly recommend for any first-time builder."

Maria S. · Orlando, FL

"Following this guide, I built a high-end gaming PC that consistently hits 144+ FPS in all my favorite titles. The section on component planning was particularly helpful in making smart budget decisions."

David L. · Seattle, WA

"A very comprehensive guide. While I did run into a minor issue with a loose power cable, the troubleshooting tips helped me quickly resolve it. It's a fantastic resource, though a few more visual aids would be a bonus."

Jessica P. · Denver, CO

"As someone who'd only ever bought pre-builts, learning how to build a gaming PC step by step was intimidating. This article broke it down perfectly, giving me the confidence to customize my setup exactly how I wanted it."

Chris B. · Boston, MA

Frequently Asked Questions

Is it really cheaper to build a gaming PC than to buy a pre-built one?

Generally, yes. Building your own PC almost always offers better performance for your money. Pre-built systems include labor costs, marketing, and often use slightly lower-quality components in less visible areas. By building, you save on these markups and can choose exactly where to allocate your budget for maximum impact.

What if I make a mistake and break a component?

While component damage is a concern, it's relatively rare if you follow instructions carefully, use anti-static precautions, and don't force anything. Most components come with warranties, but accidental damage during assembly is typically not covered. Take your time, watch video guides, and if unsure, consult online forums or a local tech expert.

How do I know if my chosen components are compatible?

Compatibility is crucial. Use online PC building tools like PCPartPicker.com, which automatically check for compatibility issues between your selected CPU, motherboard, RAM, GPU, and PSU. Always double-check CPU socket types, RAM generations (DDR4 vs. DDR5), and power supply wattage requirements.

How much does it cost to build a decent gaming PC?

A 'decent' gaming PC can range from $700-$1200 USD for 1080p/1440p gaming at high refresh rates. High-end systems capable of 4K gaming or extreme performance can easily cost $1500-$3000+. Your budget dictates the performance tier, but building allows for the best bang-for-your-buck at any price point.

What's the difference between an air cooler and an AIO liquid cooler?

Air coolers use a heatsink with fins and a fan to dissipate heat, being generally more affordable, easier to install, and reliable. AIO (All-In-One) liquid coolers use a pump, radiator, and fans to circulate a coolant, often providing superior cooling performance and a cleaner aesthetic, but at a higher cost and with slightly more complex installation.

Who should consider building their own gaming PC?

Anyone looking for maximum performance for their budget, complete control over their system's aesthetics and components, or those who enjoy a hands-on project should consider building. It's also ideal for individuals who want to easily upgrade specific parts in the future without buying an entirely new system.

Is static electricity a real threat when building a PC?

Yes, static electricity is a very real threat. A static discharge can permanently damage sensitive electronic components, often without any visible signs. Always use an anti-static wrist strap connected to a grounded metal object (like your PC case's unpainted metal frame) and work on a non-carpeted surface to minimize risk.

Will PC building become obsolete with cloud gaming on the rise?

While cloud gaming offers convenience, it's unlikely to make PC building obsolete in the foreseeable future. Dedicated gaming PCs offer superior latency, uncompressed graphics, no subscription fees for core hardware, and the freedom to play offline or with specific mods and peripherals. The DIY aspect and sense of ownership also appeal to many enthusiasts.

Ready to take control of your gaming destiny? Follow this comprehensive guide on how to build a gaming PC step by step and unlock a world of personalized performance, cost savings, and the immense satisfaction of creating your own powerful machine. Your ultimate gaming experience awaits!

Topics: how to build a gaming PC step by stepDIY gaming computerPC building guidecustom gaming riggaming PC components
Leo List

IE Escorts NO Escorts US Escorts NZ Escorts AU Escorts
Brampton weed
Adultwork EstrelaBet Vai de Bet R7 Bet Betão Galera Bet Rainbet Bet9ja Shop SportyBet BetKing Sisal Loto Foot Hollywoodbets YesPlay Odibets RushBet Jugabet BetWarrior BetCity MSport betPawa Fortebet