Mastering How to Build a Gaming PC: Your Ultimate Guide
July 25, 2026 17 min read 3,432 words
Unlock unparalleled gaming performance and save big by assembling your own custom gaming rig with our expert tutorial.
Start Building Your Dream PC
Understanding Core Gaming PC Components
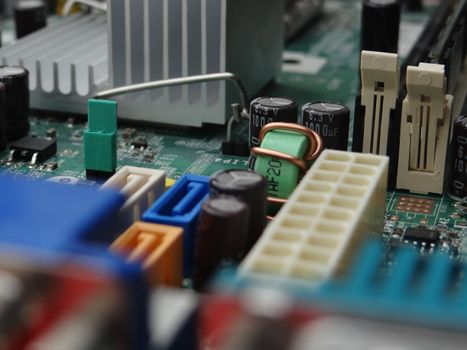 Photo: Djenz Van Eysendeyk / Pexels
Embarking on the journey of how to build a gaming PC begins with a thorough understanding of its fundamental components. Each part plays a pivotal role in the overall performance, longevity, and cost of your system. A well-informed selection process is the bedrock of a successful build, ensuring compatibility and preventing future headaches. Let's delve into the essential hardware that forms the heart of any formidable gaming machine.
First and foremost is the Central Processing Unit (CPU), often referred to as the 'brain' of your computer. For gaming, a CPU with high clock speeds and a reasonable core count is generally preferred. Brands like Intel (Core i5, i7, i9) and AMD (Ryzen 5, 7, 9) offer excellent choices across various price points. While a powerful CPU is vital, it's important to balance its capabilities with your chosen Graphics Processing Unit (GPU) to avoid bottlenecks. A common misconception is that the CPU is solely responsible for gaming performance; in reality, while crucial, its impact on frame rates often takes a backseat to the GPU in most modern games.
Speaking of the GPU, or graphics card, this is arguably the single most important component for a gaming PC. It renders the stunning visuals you see on your screen, directly influencing frame rates and graphical fidelity. NVIDIA's GeForce RTX series and AMD's Radeon RX series dominate the market, offering a wide spectrum of performance and features, including ray tracing and DLSS/FSR technologies. Your budget for the GPU will likely be the largest portion of your overall build cost, and investing in a capable card is paramount for a satisfying gaming experience. Consider your target resolution and desired frame rate when making this critical choice. For example, if you aim for 4K gaming, you'll need a significantly more powerful GPU than for 1080p gaming.
The Motherboard acts as the central nervous system, connecting all your components and allowing them to communicate. It must be compatible with your chosen CPU (socket type) and RAM (DDR4 or DDR5). Key features to look for include the number of RAM slots, PCIe slots for your GPU and other expansion cards, M.2 slots for fast SSDs, and sufficient USB ports. Don't overspend on an ultra-high-end motherboard if you're on a budget, but also avoid skimping too much, as it dictates upgrade paths and system stability. A good motherboard ensures reliable performance and connectivity for years to come.
Choosing the right motherboard is a crucial step in any PC build.
Random Access Memory (RAM) is your system's short-term memory, enabling quick access to data for running applications and games. For a modern gaming PC, 16GB of DDR4 RAM is generally considered the sweet spot, with 32GB becoming increasingly common for high-end systems or future-proofing. Look for kits with higher clock speeds (e.g., 3200MHz or 3600MHz) and lower CAS Latency (CL) for better performance. Ensure your chosen RAM is compatible with your motherboard and CPU. The difference between 16GB and 32GB might not be immediately apparent in all games, but it provides more headroom for multitasking and demanding titles.
Storage comes in two main flavors: Hard Disk Drives (HDDs) and Solid State Drives (SSDs). HDDs offer large capacity at a low cost, suitable for bulk storage of games you don't play frequently or media files. However, for your operating system and frequently played games, an SSD is essential. NVMe SSDs, which connect directly to the motherboard via an M.2 slot, offer significantly faster load times and overall system responsiveness compared to traditional SATA SSDs. Aim for at least a 500GB NVMe SSD for your OS and primary games, supplemented by a larger HDD or secondary SATA SSD if needed.
Finally, the Power Supply Unit (PSU) is often overlooked but is critically important. It supplies power to all your components. Do not compromise on your PSU. Choose a reputable brand with an 80 Plus certification (Bronze, Gold, Platinum, Titanium) which indicates its efficiency. Calculate your system's total wattage requirements (online calculators are helpful) and then select a PSU with a slightly higher wattage capacity to allow for future upgrades and efficient operation. An underpowered or unreliable PSU can lead to system instability or even damage components. Investing in a good PSU ensures stable power delivery and peace of mind.
Step-by-Step Assembly: Bringing Your Vision to Life
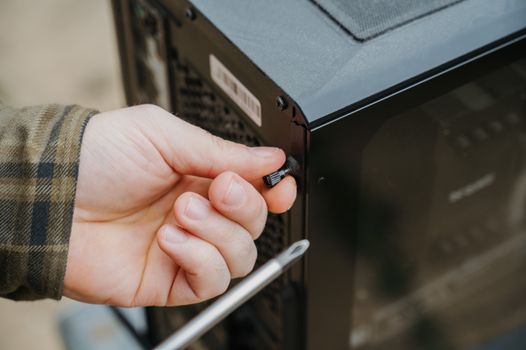 Photo: Anete Lusina / Pexels
Now that you have all your components, the exciting part of how to build a gaming PC begins: assembly. While it might seem daunting, taking your time, following instructions, and being methodical will ensure a smooth process. Before you start, ensure you have a clean, well-lit workspace with plenty of room. Gather your tools: a Phillips head screwdriver (magnetic tip is a bonus), zip ties or Velcro straps for cable management, and potentially a headlamp for better visibility inside the case. Crucially, ground yourself by touching a metal object or wearing an anti-static wrist strap to prevent electrostatic discharge (ESD), which can damage sensitive components.
Begin by preparing your motherboard. Unbox it and place it on its anti-static bag or a non-conductive surface. The first component to install is typically the CPU. Open the CPU socket lever, carefully align the CPU (there's usually a small triangle or arrow on the CPU and socket that must match), and gently lower it into place. Do not force it. Once seated, close the lever to secure it. Next, install the CPU cooler. If it's a stock cooler, it usually clips on. If it's an aftermarket air cooler, apply thermal paste (if not pre-applied) and mount it according to the manufacturer's instructions. For All-in-One (AIO) liquid coolers, you'll install the CPU block first, then mount the radiator and fans to the case later.
After the CPU and cooler (or just the CPU if using an AIO), install your RAM. Locate the RAM slots on your motherboard. Open the clips on both ends of a slot, align the RAM stick (there's a notch that must match the slot's key), and push down firmly and evenly on both ends until the clips snap into place. Repeat for all your RAM sticks, ensuring they are in the correct slots for dual-channel operation (check your motherboard manual).
Next, install your M.2 NVMe SSD(s) if you have them. These small drives slot directly into M.2 slots on the motherboard, often secured by a small screw. Be gentle when pushing them into the slot at an angle, then push down to secure with the screw. If you have SATA SSDs or HDDs, these will be mounted in drive bays within the case later.
With these components on the motherboard, it's time to install the motherboard into the PC case. First, install the I/O shield into the back of the case (if it's not integrated into your motherboard). Then, carefully lower the motherboard into the case, aligning it with the standoffs (small risers that prevent the motherboard from shorting on the case). Screw the motherboard securely into place using the provided screws. Ensure all screws are tightened but not overtightened.
Now, install your Graphics Card (GPU). Locate the primary PCIe x16 slot (usually the top one, reinforced). Open the retention clip at the end of the slot. Carefully align the GPU and push it firmly into the slot until it clicks and the retention clip closes. Secure the GPU to the case with screws or a latch mechanism. Connect the necessary PCIe power cables from your PSU to the GPU. This is often the most satisfying step, as the GPU is the visual centerpiece of a gaming PC.
Finally, install the Power Supply Unit (PSU) into its designated bay (usually at the bottom or top rear of the case). Secure it with screws. Then, connect all the necessary power cables: the 24-pin ATX power cable to the motherboard, the 8-pin (or 4+4-pin) CPU power cable to the motherboard, the PCIe power cables to your GPU, SATA power cables to your SATA SSDs/HDDs, and any fan headers or RGB headers. Connect the front panel connectors from your case (power button, reset button, USB ports, audio jacks) to the corresponding pins on your motherboard – this is often the trickiest part, so consult your motherboard manual carefully. Route cables neatly behind the motherboard tray for better airflow and aesthetics. This meticulous approach to
PC cable management not only looks good but also improves cooling.
First Boot, Software Installation, and Optimization
 Photo: Suliman Sallehi / Pexels
You've successfully assembled your gaming PC! The next crucial phase involves the initial boot, operating system installation, and optimizing your new machine for peak gaming performance. This stage can be incredibly rewarding, as you witness your handiwork come to life for the first time. However, it's also where you'll troubleshoot any minor assembly errors or configuration issues, so approach it with patience and a problem-solving mindset.
Before powering on, double-check all connections. Ensure the 24-pin ATX and 8-pin CPU power cables are fully seated, the GPU is firmly in its slot with power cables connected, and all front panel connectors are correctly attached. Connect your monitor, keyboard, and mouse. Now, with bated breath, flip the PSU switch to 'on' and press the power button on your case. If everything goes well, you'll see fans spinning, lights illuminating, and most importantly, a signal on your monitor. If not, don't panic. Common issues include a forgotten power cable, improperly seated RAM, or incorrect front panel wiring. Refer to your motherboard manual's POST (Power-On Self-Test) code explanations if your board has a diagnostic LED display.
Once you get a display, your system will likely boot into the BIOS (Basic Input/Output System) or UEFI (Unified Extensible Firmware Interface). This is the firmware that initializes hardware during the booting process and provides runtime services for the operating system. In the BIOS, you'll want to verify that all your components are recognized (CPU, RAM, storage drives). Set the correct boot order to your USB drive containing your operating system installer (e.g., Windows 10 or 11). Enable XMP (Extreme Memory Profile) or DOCP (Direct Overclock Profile) for your RAM to ensure it runs at its advertised speed, not just the base speed. Save and exit the BIOS.
With the boot order set, your PC will now boot from your USB installer. Follow the on-screen prompts to install your chosen operating system. This typically involves selecting your language, accepting terms, choosing a custom installation, and selecting your primary NVMe SSD as the installation drive. The OS installation process can take anywhere from 15 to 45 minutes, depending on your drive speed. Once the OS is installed and you've completed the initial setup (account creation, network connection), the real optimization begins.
The very first thing to do post-OS installation is to install all necessary drivers. Start with your motherboard chipset drivers, which are usually found on the motherboard manufacturer's website. These are crucial for proper communication between components. Next, install your graphics card drivers. For NVIDIA, download GeForce Experience; for AMD, download Radeon Software Adrenalin Edition. These utilities will automatically detect your GPU and install the latest drivers, which are vital for gaming performance and stability. Don't forget drivers for any other peripherals like Wi-Fi adapters or sound cards.
Once drivers are installed, run Windows Update to ensure your operating system is fully patched. Then, move on to performance optimizations. Adjust Windows power settings to 'High Performance' or 'Ultimate Performance'. Disable unnecessary background apps, especially those that consume significant resources. Within your GPU's control panel (NVIDIA Control Panel or AMD Radeon Software), you can fine-tune game-specific settings, create custom resolutions, and monitor performance. For storage, ensure your games are installed on your faster SSDs for quicker load times. Regularly update your drivers and OS, and keep an eye on gaming news for any specific game optimizations. Consider installing monitoring software like HWMonitor or MSI Afterburner to keep an eye on temperatures and clock speeds while gaming. This iterative process of installing and optimizing ensures your custom-built gaming PC performs at its absolute best, delivering the immersive experiences you built it for. For more advanced tweaks, consider
optimizing your gaming settings for maximum FPS.
Common Mistakes to Avoid When Building Your Gaming PC
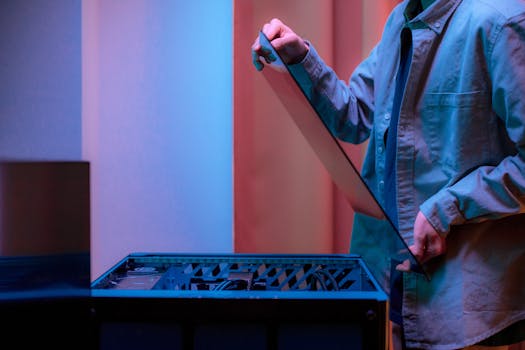 Photo: Ron Lach / Pexels
Building your own gaming PC is a rewarding experience, but it's not without its potential pitfalls. Being aware of common mistakes can save you time, frustration, and money. Here are some key errors to avoid:
* **Ignoring Compatibility:** This is perhaps the biggest and most frequent mistake. Ensure your CPU socket matches your motherboard, your RAM type (DDR4 vs. DDR5) and speed are supported, and your GPU physically fits in your case and has enough PCIe power connectors. Use online PC Part Picker tools to verify compatibility before purchasing.
* **Skimping on the Power Supply Unit (PSU):** An unreliable or underpowered PSU can lead to system instability, crashes, and even component damage. Never cheap out on the PSU. Always choose a reputable brand with an 80 Plus certification (Gold or higher is recommended) and calculate your wattage needs with a buffer for future upgrades.
* **Poor Cable Management:** While primarily aesthetic, poor cable management can obstruct airflow, leading to higher temperatures and reduced component lifespan. Take the time to route cables neatly behind the motherboard tray and use zip ties or Velcro straps. Good airflow is crucial for maintaining optimal performance.
* **Forgetting Thermal Paste (or Applying Too Much/Little):** The CPU cooler needs thermal paste to efficiently transfer heat from the CPU to the heatsink. Most aftermarket coolers come with pre-applied paste or a tube. If applying yourself, a pea-sized dot in the center is usually sufficient. Too much or too little can hinder cooling performance.
* **Not Installing Drivers:** Your PC won't perform optimally, or sometimes even function correctly, without the latest drivers for your motherboard, GPU, and other peripherals. Always install chipset drivers first, followed by graphics drivers, and then any other necessary component-specific drivers.
* **Improper RAM Installation:** RAM sticks need to be fully seated in their slots and in the correct dual-channel configuration (check your motherboard manual for which slots to use). If RAM isn't seated properly, your PC may not boot or will only recognize a portion of your installed memory.
* **Forgetting the I/O Shield:** This small metal plate goes into the back of your case before the motherboard. It's often forgotten and is a minor annoyance to install once the motherboard is in place, requiring partial disassembly.
* **Rushing the Build:** Take your time. Read manuals. Watch tutorial videos. Rushing increases the likelihood of making mistakes, damaging components, or overlooking crucial steps. Patience is a virtue when building a PC.
By being mindful of these common pitfalls, you can significantly streamline your PC building process and ensure a successful, high-performing gaming rig from the start.
